


Introduction:
Did you know? We have approximately 1.6 billion iOS applications in the apple store. Are you looking to upload your new application to the App Store? This step-by-step guide on How to upload an app to the apple store will help make the process of adding your application to the App store easy. We request you read the entire blog to understand the process completely.
Things to keep in mind before uploading the application to the App store?
- Before uploading the application to the apple store. You need to have Xcode already installed in your system.
- Secondly, you need to have your application ready for submission.
- Next crucial point is that your application must follow all the Guidelines given by Apple’s App Store. If not, you may not be allowed to submit your application to the App store.
- Then you need to have a valid Apple developer program account.
- A machine that runs the Mac operating system.
How to upload an app to Apple store?
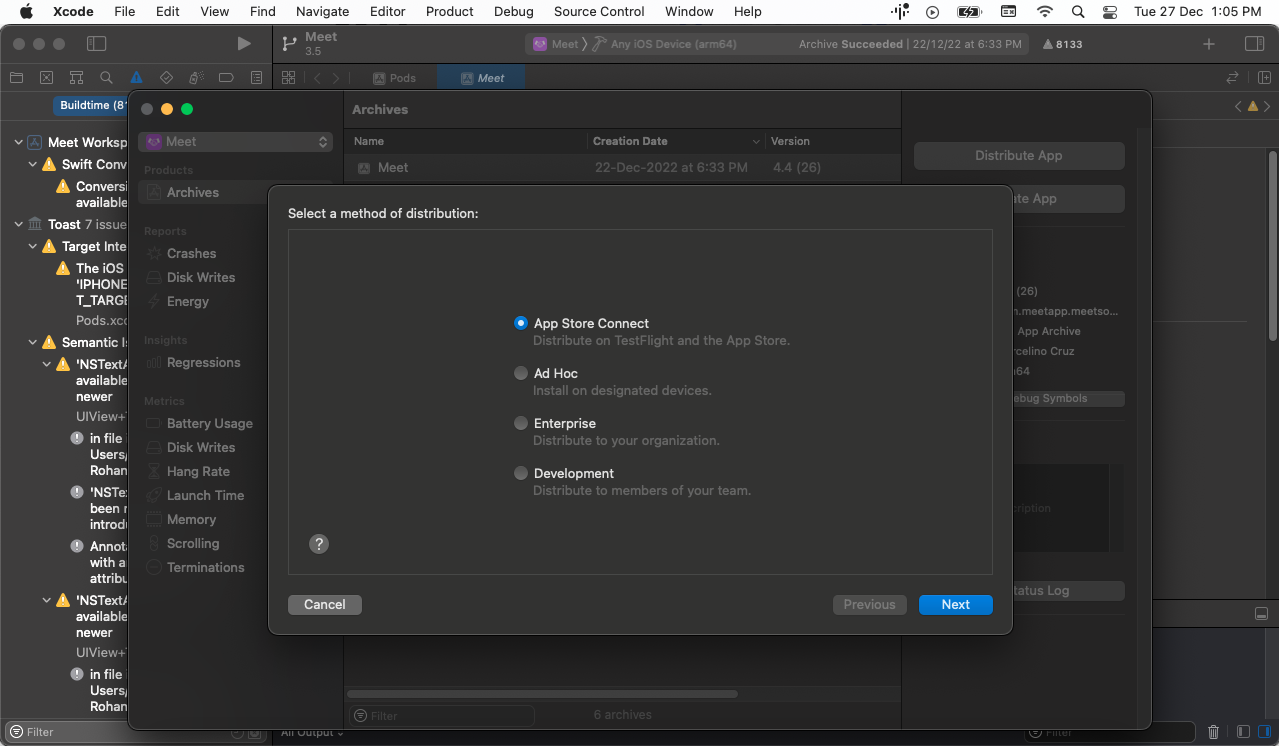
To submit your application on the App store. You must have a separate distribution provisioning profile and distribution certificate. One of the ways that you get this certificate is by using Xcode. Xcode is an application that helps you to create and manage certificates. It will also handle device registration and signing identities for you.
To sign your application manually. Please follow the steps given below.
- First, add your developer program account to Xcode.
- In the top menu select Xcode then choose preferences.
- In the bottom left corner of the window click on accounts.
- Press the + sign then all your Apple IDs.
- After entering your apple ID, add the password
Make sure you use the same password that you used for the Apple developer program, then click sign in.
- Enable automatic signing
- From the project editor, choose the target
- Select general
- Scroll down the signing section
- Select your team
- Check the automatic manage signing
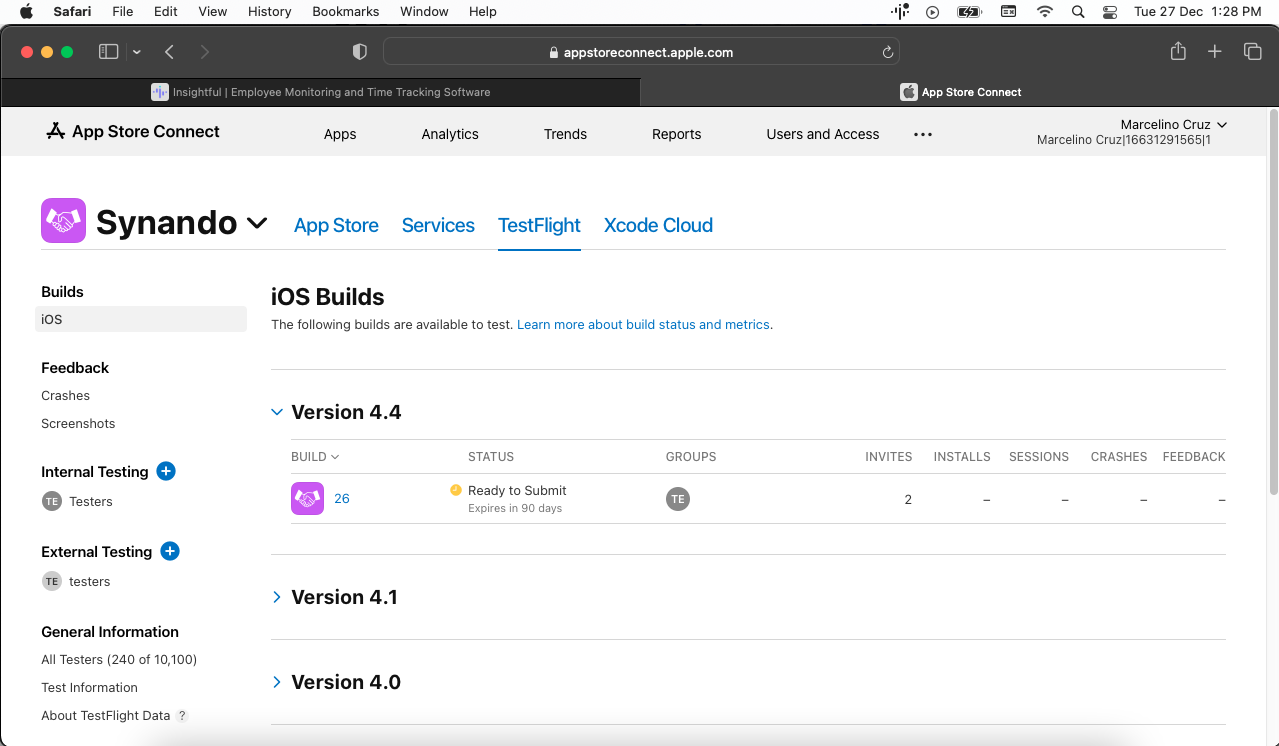
Publishing process on the App Store
- Create a New App in App Store Connect
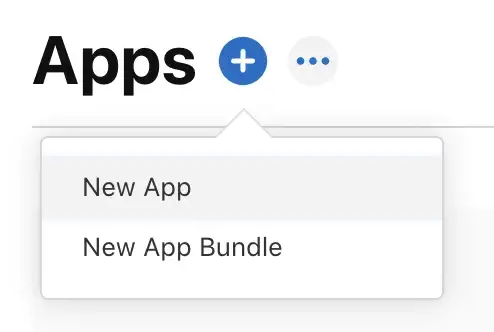
- You need to start with Apple Store Connect.
- Then go to My apps
- Tap the + button
- Click on Create a New App
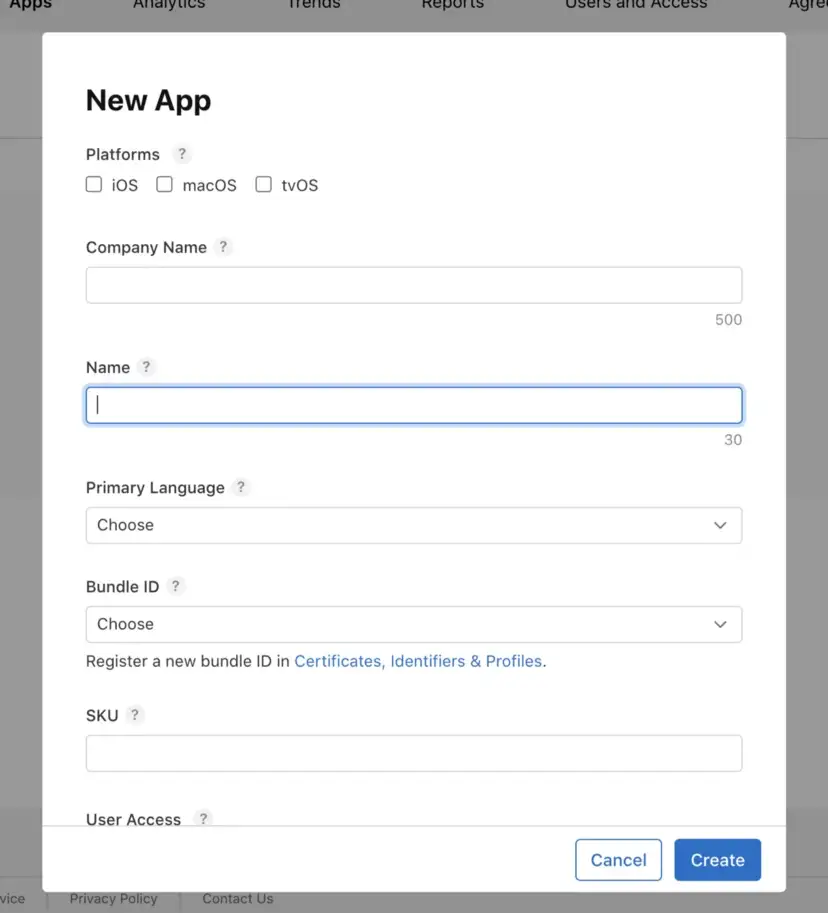
To create a new application, you need to fill in the basic details about your applications.
These details can be related to
Name: You need to add the name of your iOS application. You need to add the name up to 30 characters. The user will see the same name that you will add here. Make sure the name you select must be relevant to your application.
Platforms: In this part, you need to add the platforms that your iOS application supports.
Primary Language: This is the main language for your iOS app’s information. Your users can find your application in this language in case of missing translations for a specific language.
Bundle ID: In this part, you need to select from the app identifiers that are registered in the Developer’s account. Keep in mind to choose the same ID that was used in the Xcode during app archiving.
SKU (Stock Keeping Unit). This step is optional for you. For more details, you can visit here.
User Access: It is used to specify if the iOS application is accessible to all the members.
Then after filling in the details, you can click on Create. Then it will redirect you to the next page, that Product page.
Create a Product Page
Now, the next step is to create a product page. In this section, you need to fill in the details of your application in detail. Make sure you add the correct information as this information about your iOS application is visible to all Apple users. You can understand this information as the metadata about your application.
iOS APP / Version Information
This is a section in which you need to add information about the current version. If you are updating the version of your application, then you can include the list of updates you are providing to Apple users in this section.
This section is divided into following sections:
App previews: App previews can be localized. This will include a short video in which you can include the core features of your application. You can create up to 3 app previews of 30 seconds each.
App Screenshots: App Screenshots: You can add up to 10 screenshots with your iOS application. This will help apple users to understand the user interface design of your application. Out of these 10 screenshots, the first two screenshots will be shown to Apple users whenever they are searching for your application in the app store. These screenshots can be language specific according to the app previews.
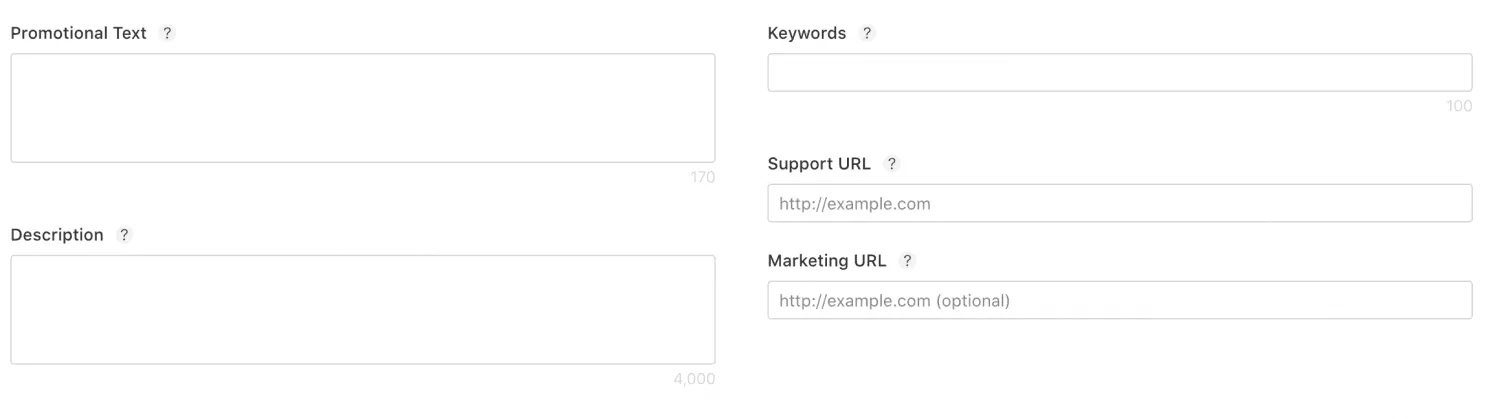
Promotional text: Since there is a limit in the description field characters. The promotional text comes with an opportunity for you so you can add some more information about your application that you have not added in the description section.
Description: In this area, you can put detailed information about your iOS application.
Keywords: You can put some keywords here in this section. Make sure that these keywords are relevant to your application since these keywords are used by apple users to search about your application.
Support URL: This is a mandatory field in which you need to add the support link to your application. If you have a website for your application, then you can add a link here. If you do not have a proper website, then you can create one by using platforms like Wix and add the link here.
Marketing URL: Here you can add the URL by which users can read the marketing-related information about your application.
iOS App / Build
Click on “Select a build before you submit an app” followed by a step in which it is asking if your application uses encryption or not. You can answer this based on your preferences.
Then it will redirect you to the page where you need to fill in the General information
General Information
Version: Here you can see the version of your app. In case of an update, this number can be higher than 1.
Copyright: In this field, you need to write the name of the owner of your application.
App rating: Some questions will ask of you by Apple. Then according to your answers, the Apple specialist will be able to assign the age group of the user that can be able to see your application.
Routing App Coverage file: Specify the geographic region that is supported by your application.
After completing the general information section. The next section is about your app review information. Look into it in detail.
App Review Information
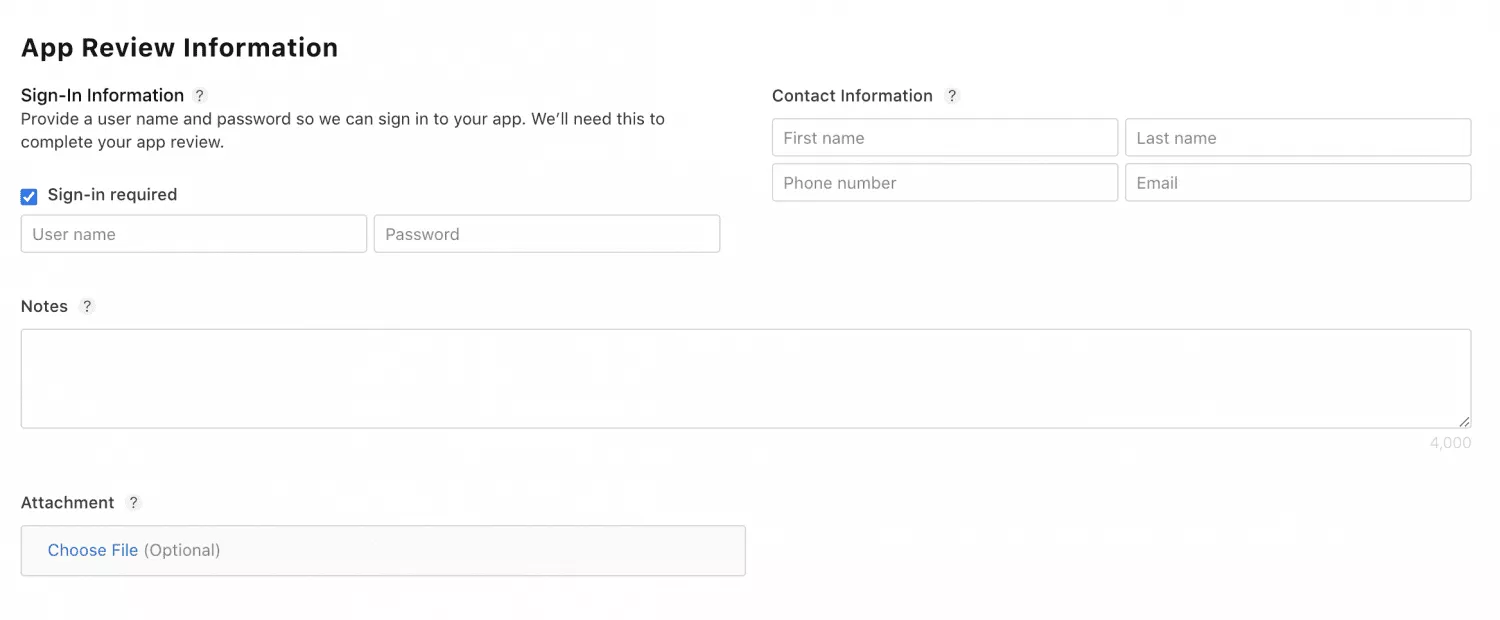
Apple allows you to specify test credentials to the tester and fill in the contact information in case the tester would want to ask any questions.
You can also add notes for the reviewer which can help him or her in the operation of your application.
Version-Release:
You can choose who do you want to release your application to:
1) Manually: By clicking the Release button
2) Automatically: Just after receiving the positive review from the reviewer
3) Automatically with date restriction: App gets released automatically on a specified date.
General App Information:
This tab contains the app information you filled in during your application’s creation.
This tab also contains information regarding Content Rights. If your iOS application contains and shows information from a third-party source, it should have the rights to it.
Now after reading information on Content Rights section. Here comes another important section in the guide. In this section you are required to fix your iOS application’s price.
General / Specify Pricing and Availability
Price Schedule:
In this part, you need to fix a price. This is a price, the downloader or user of your
application will pay at the time of downloading.
Availability:
This Section specifies the countries and regions in which you want your application to be
available in.
iPhone and iPad apps:
This is one of the features that is added by Apple recently. Apple allows their iPad and iPhone applications to be run on their newest silicon Macs with M1 chip.
Now make sure you go through the App privacy guidelines in detail. That is another section in the guide.
General / App Privacy

With this option, Apple allows you to put the URL to the privacy policy. With this, your
application users can modify which data their application will collect.
Apple has also added App Privacy Details on the App Store.
As an owner of your application, you need to fill out the form that gives information that what kind of data your application collects and how you are supposed to use this data.
After tapping on ‘Set up’ this form. You are redirected to another form where you need to specify the information about the data collected by you or your third-party partners. Data can be divided into three sections:
- Data used to track you
- Data linked to you
- Data not linked to you
These data privacy settings can be edited in the future according to changes in your applications.
In-App Purchases
There are 4 types of in-app purchases that Apple offers: If you want to know more about this feature, then you may visit this website.
- Consumable
- Non-Consumable
- Auto-Renewable Subscription
- Non-Renewing Subscription
Submit your app for review

This is the second last step in the guide How to upload an app to apple store. Now in this step, you can submit the iOS application for review. You can click the “Submit for Review” option.
This section will ask you to answer some questions such as Export compliance, content rights, and advertising identifier questions, etc.
Publish your application
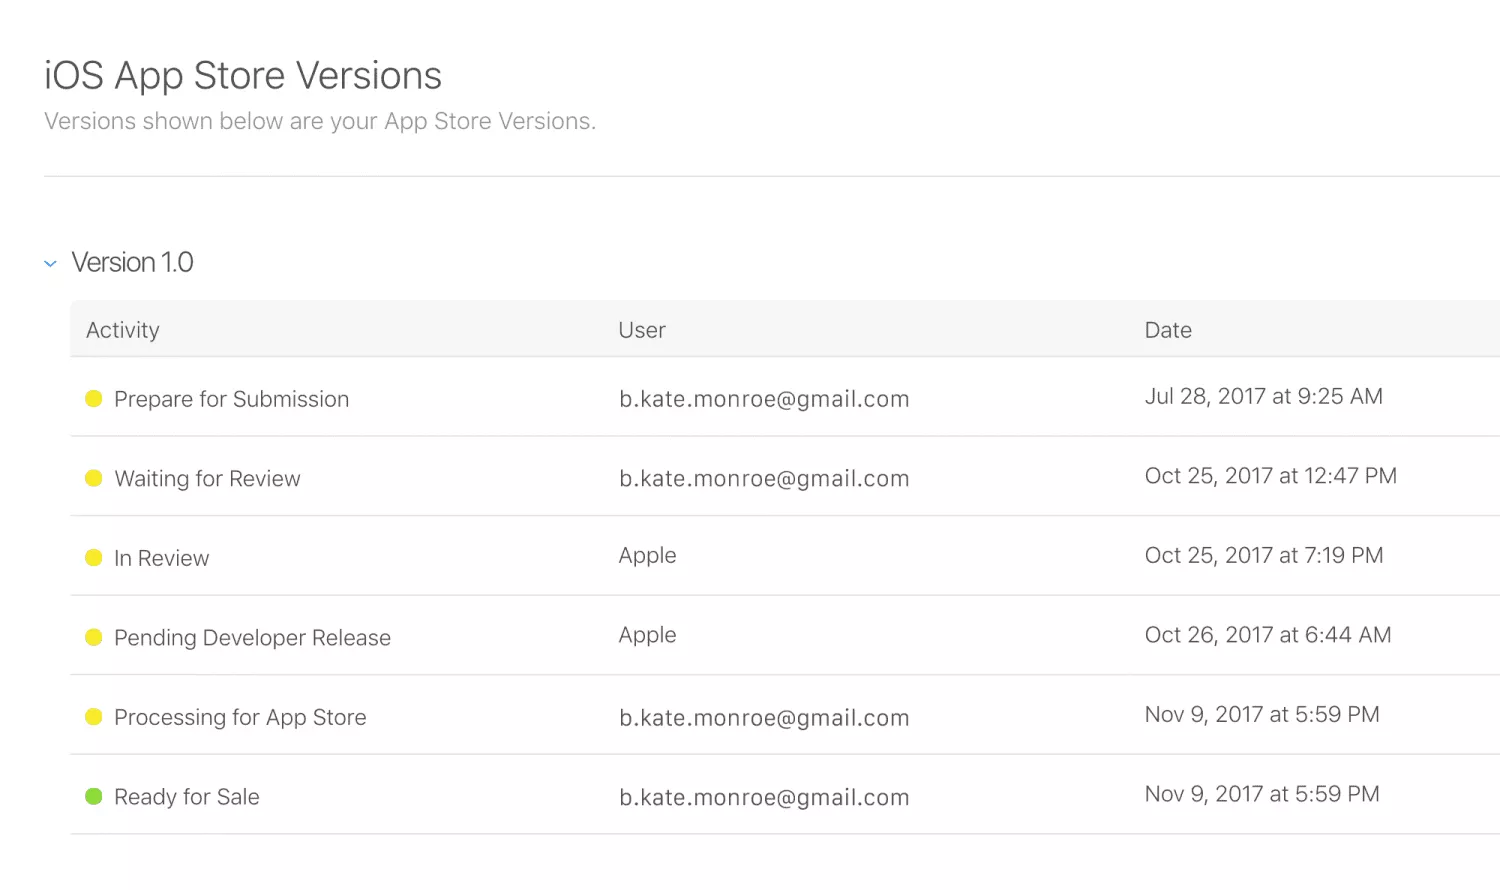
This is the last step; you successfully published your application from your end. Now it is time to wait for an Apple specialist to approve and test your application. To check the status can click on the General / Version history tab.
What Happens After I Submit My App to the Apple Store?
It might take up to 2 weeks for the iOS application to get approval from Apple. After the submission of your application, Apple will review your application on the basis to ensure that your application is compliant with their guidelines.
To ease the process for you, we recommend you go through the guidelines before starting to develop your application from scratch.
Summary
We hope this guide on How to upload an app to apple store is helpful for you. Creating reliable and user-friendly mobile applications is as important as uploading and submitting the iOS applications to the App store. To create an iOS application, you can take the help of a mobile app development company, or you can hire mobile application experts. These development companies can also help you to Hire iOS app developers based on your requirements
Our experts can help you to upload an app to the Apple store.
Frequently Asked Questions on How to upload an app to apple store
1) How much does it cost to publish an iOS app on the App Store?
Ans) You must sign up for the Apple Developer Program to be able to submit apps to the App store. This account will cost you a $99 yearly fee. Along with this option to publish your application for this fee, the Apple store allows you some more benefits such as beta access to Apple software and the testing tool TestFlight.
2) How JumpGrowth will help you in building mobile app strategies to boost your application reach?
Ans) JumpGrowth, as a mobile app development company, will guide you on how to upload to the App store. We will help you in creating the best iOS application according to your requirements. If you have an idea, you can contact us so that we can start the process.
3) How long does it take to publish an iOS app?
Ans) It will take around 24 hours, that is 1 day to publish an iOS application to the Apple App store.